
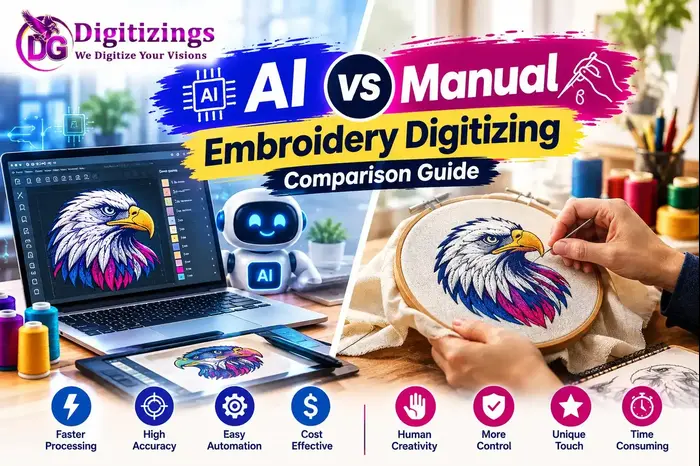
Embroidery digitizing has changed a lot in recent years. New technology is making the process faster and easier. At the same time, manual digitizing remains an important skill for creating detailed and accurate embroidery designs.
AI embroidery digitizing and manual embroidery digitizing both have their own benefits. They also have different limitations. The right choice depends on the design, fabric, machine, and level of quality you need.
In this guide, we will compare AI vs manual embroidery digitizing in simple terms. You will learn how both methods work, where they perform well, and what to consider before choosing one.
What Is AI Embroidery Digitizing?
AI embroidery digitizing uses artificial intelligence and automated software to turn artwork into an embroidery design.
The software analyzes the artwork and creates stitch objects based on its settings. Depending on the program, AI tools may identify shapes, colors, edges, and other parts of an image.
The process can be much faster than creating every stitch manually.
AI-assisted software may help with tasks such as:
- Detecting shapes
- Creating stitch areas
- Selecting stitch types
- Suggesting stitch directions
- Generating underlay
- Adjusting stitch density
- Removing backgrounds
- Creating basic embroidery objects
- Converting artwork into embroidery files
The exact features depend on the software.
What Is Manual Embroidery Digitizing?
Manual embroidery digitizing is the process of creating an embroidery design by controlling the design objects and stitch settings yourself.
A professional digitizer studies the artwork first. They then decide how each part should be embroidered.
The digitizer can control:
- Stitch type
- Stitch direction
- Stitch density
- Underlay
- Stitch length
- Pull compensation
- Object order
- Thread changes
- Design size
- Special effects
Manual digitizing takes more time. However, it gives the digitizer detailed control over the final design.
AI vs Manual Embroidery Digitizing: Quick Comparison
Both methods can produce embroidery files, but the workflow is different.
| Feature | AI Digitizing | Manual Digitizing |
|---|---|---|
| Speed | Usually faster | Usually slower |
| User control | Depends on software | Very high |
| Simple designs | Often suitable | Suitable |
| Complex designs | May need editing | Strong control |
| Small lettering | May need adjustment | Detailed control |
| Fabric adjustments | May require manual changes | Can be customized |
| Learning curve | Often easier to start | Requires more practice |
| Automation | High | Low |
| Customization | Depends on tools | Extensive |
| Human judgment | Limited in automation | Central to the process |
This table gives a basic overview. Actual results depend on the software, artwork, digitizer, and embroidery machine.
How AI Embroidery Digitizing Works
AI digitizing usually starts with an artwork file.
The user uploads a logo, image, or other design into the software. The system then analyzes the artwork.
Next, it may identify different areas of the design. It can then assign embroidery objects and generate stitches.
The user can preview the result and make changes if needed.
A simple AI workflow may look like this:
- Upload the artwork.
- Remove or adjust the background.
- Let the software analyze the design.
- Generate embroidery objects.
- Select stitch settings.
- Adjust density and underlay.
- Preview the embroidery.
- Edit problem areas.
- Export the embroidery file.
- Test stitch the design.
AI can reduce the amount of manual work. However, the generated design may still need human editing.
How Manual Embroidery Digitizing Works
Manual digitizing starts with a detailed review of the artwork.
The digitizer considers the design size, fabric, embroidery machine, thread, and other production requirements.
Each object is then created and adjusted separately.
A typical manual workflow includes:
- Prepare the artwork.
- Set the correct design size.
- Divide the artwork into embroidery objects.
- Select suitable stitch types.
- Set stitch directions.
- Add underlay where needed.
- Adjust stitch density.
- Set pull compensation.
- Arrange the stitch sequence.
- Preview the design.
- Make corrections.
- Test stitch the design.
This process can take longer, but it allows detailed control.
Speed: AI vs Manual Digitizing
Speed is one of the biggest differences between the two methods.
AI can create a basic embroidery layout in a short time. This can be helpful when you have many simple designs to process.
Manual digitizing takes longer because the digitizer makes more decisions.
However, speed should not be the only factor.
An AI-generated design may require corrections. If the design needs many changes, the time saved during automatic creation may be reduced.
Manual digitizing may take longer at the beginning, but a skilled digitizer can build the design with production requirements in mind from the start.
Accuracy and Design Control
Accuracy is another important factor.
AI tools can recognize common shapes and create basic stitch structures. They can work well with simple artwork.
Complex artwork can be more difficult.
For example, a detailed logo may contain small text, overlapping shapes, thin lines, and different stitch areas. These elements may require careful decisions.
Manual digitizing gives the user more direct control over each part of the design.
The digitizer can decide exactly where stitches should start and stop. They can also control the direction and order of different objects.
AI Digitizing for Simple Designs
AI can be useful for simple embroidery artwork.
Examples include:
- Basic logos
- Simple symbols
- Large shapes
- Simple text
- Basic icons
- Clean artwork with clear colors
When the artwork is simple, automated tools may produce a useful starting point.
Even then, it is important to review the generated file before production.
Manual Digitizing for Complex Designs
Manual digitizing can be useful for designs that need detailed control.
These may include:
- Detailed logos
- Small lettering
- Complex patches
- 3D puff designs
- Cap embroidery
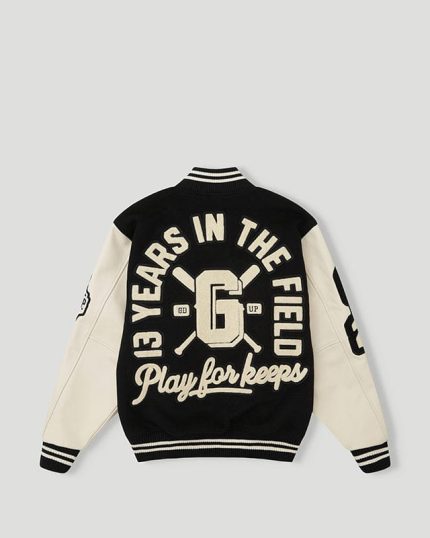
- Jacket-back designs
- Applique
- Detailed artwork
- Designs with many overlapping objects
- Designs for difficult fabrics
Complex embroidery often requires decisions that cannot be made from artwork alone.
The digitizer needs to understand how the design will behave when stitched.
Which Method Is Better for Small Text?
Small text can be challenging in embroidery.
Letters have limited space. If they are too small or contain too many details, they may not stitch clearly.
AI tools can create lettering quickly, but the result may need careful checking.
Manual digitizing allows the digitizer to adjust letter shapes, stitch direction, density, and other settings.
For important small lettering, detailed manual editing can be valuable.
Which Method Is Better for 3D Puff Embroidery?
3D puff embroidery requires careful planning.
The design needs suitable shapes, stitch directions, density, and sequencing. Some areas also need to be prepared so the foam can produce the desired raised effect.
AI tools may help create parts of a design. However, 3D puff work often benefits from detailed manual control.
The exact workflow depends on the software and the design.
AI vs Manual Digitizing for Caps
Caps have a curved surface. This creates additional embroidery challenges.
The design must be planned carefully to reduce distortion.
Important factors include:
- Stitch direction
- Center-out sequencing
- Density
- Underlay
- Design width
- Letter size
- Placement
Automated tools can provide a starting point, but cap designs often need careful review and adjustment.
Manual digitizing gives the digitizer more control over these details.
The Role of Human Experience
Software can create stitches, but embroidery is more than creating stitches.
An experienced digitizer understands how different materials react during embroidery.
For example, a T-shirt, denim jacket, cap, and towel may require different settings.
Human experience can help identify problems before they appear during production.
A skilled digitizer can also make decisions based on the final purpose of the design.
This is one reason why AI and manual digitizing do not have to be competing methods.
AI can assist the process while a skilled digitizer checks and improves the result.
Can AI Replace Manual Embroidery Digitizing?
AI is changing the embroidery industry, but it does not remove the need for human knowledge.
AI can automate repetitive tasks. It can also help users create a starting point faster.
However, automated results may still need adjustments.
The final quality can depend on:
- Artwork quality
- Software capabilities
- Design complexity
- Fabric type
- Machine type
- Thread selection
- Stitch settings
- Human editing
For this reason, AI is often most useful as a tool that supports the digitizer rather than as a complete replacement for the entire workflow.
Benefits of AI Embroidery Digitizing
AI has several useful advantages.
Faster Initial Results
AI can create a starting design quickly.
This can save time on simple artwork.
Easy for Beginners
Automated tools may be easier for beginners to understand than a completely manual workflow.
They can provide a starting point for learning.
Useful for Repetitive Work
If many designs have similar structures, automation can reduce repetitive tasks.
Quick Experimentation
Users can test different settings and design ideas more quickly.
Benefits of Manual Embroidery Digitizing
Manual digitizing also has important advantages.
Detailed Control
The digitizer controls individual objects and stitch settings.
Better Customization
Designs can be adjusted for different fabrics, sizes, and embroidery applications.
Useful for Complex Artwork
Manual work can handle detailed designs that need careful planning.
Production-Focused Decisions
An experienced digitizer can make decisions based on how the design is expected to stitch.
Limitations of AI Digitizing
AI is not perfect.
Some common limitations include:
- Incorrect stitch directions
- Poor object recognition
- Unwanted stitch density
- Weak small details
- Extra stitches
- Poor sequencing
- Limited fabric-specific adjustments
These issues do not occur with every AI tool or every design. Results depend on the software and the artwork.
This is why reviewing the generated file is important.
Limitations of Manual Digitizing
Manual digitizing also has challenges.
The biggest issue is time.
A detailed design can take considerable time to create. Beginners also need practice before they can produce consistent results.
Other challenges include:
- Steeper learning curve
- More manual work
- Longer production time
- Need for embroidery knowledge
- Need for regular practice
Despite these challenges, manual control can be valuable for demanding projects.
AI-Assisted Manual Digitizing: A Practical Approach
AI and manual digitizing do not always have to be separate methods.
A practical workflow can combine both.
For example, AI can create the first version of a simple design. A digitizer can then review the file and make manual corrections.
How to Choose Between AI and Manual Digitizing
Ask a few simple questions before choosing a method.
What Type of Design Are You Creating?
Simple artwork may be suitable for AI-assisted workflows.
Complex artwork may need more manual control.
What Fabric Will You Use?
Fabric can change how the design needs to be digitized.
Consider the material before finalizing your settings.
How Much Control Do You Need?
If you need detailed control over stitch direction, density, sequencing, and object placement, manual editing may be important.
How Quickly Do You Need the Design?
AI can help create an initial design faster.
If time is less important than detailed customization, manual digitizing may be more suitable.
Do You Have Digitizing Experience?
Beginners may find automated tools easier to start with. Experienced digitizers may prefer manual control for demanding projects.
Tips for Getting Better Embroidery Results
Whether you use AI, manual digitizing, or both, follow good embroidery practices.
- Start with clean artwork.
- Choose the correct design size.
- Consider the fabric.
- Use suitable stitch types.
- Avoid excessive stitch density.
- Use proper underlay.
- Plan stitch direction carefully.
- Reduce unnecessary jumps.
- Keep small text simple.
- Check the stitch sequence.
- Preview the design before production.
- Test important designs on the actual fabric.
These steps can help reduce common embroidery problems.
AI vs Manual Embroidery Digitizing: Final Comparison
AI digitizing focuses on speed and automation. Manual digitizing focuses on control and customization.
Neither method works exactly the same for every project.
AI can be useful for simple designs and quick starting points. Manual digitizing can be valuable when a design needs detailed control.
For many modern workflows, combining both approaches can be practical. AI can handle some repetitive tasks, while a skilled digitizer can review and improve the best result.
The most important goal is not simply to create an embroidery file. The goal is to create a file that stitches cleanly on the intended fabric and machine.
About Digitizings
Digitizings provides professional embroidery digitizing and vector art services for businesses, apparel brands, embroidery shops, and individuals.
The service can turn logos, artwork, lettering, and other designs into embroidery-ready files.
Digitizings offers services such as custom embroidery digitizing, logo digitizing, 3D puff digitizing, cap and hat digitizing, applique digitizing, patch digitizing, monogram digitizing, jacket-back digitizing, and more.
For customers who need production-ready embroidery files, professional digitizing can save time and reduce the need for repeated testing.
Conclusion
AI and manual embroidery digitizing both have an important place in modern embroidery.
AI can make the first stages of digitizing faster. It can also help beginners explore embroidery design more easily.
Manual digitizing provides detailed control over stitch direction, density, underlay, sequencing, and other important settings.
For simple designs, AI-assisted tools may provide a useful starting point. For complex designs, manual editing and professional experience can be very important.
The best workflow depends on the project. By understanding the strengths and limitations of both methods, you can choose a process that fits your design, fabric, machine, and quality requirements.
FAQs
1. What is the difference between AI and manual embroidery digitizing?
AI digitizing uses automated technology to create embroidery stitches from artwork. Manual digitizing requires the user to create and control the embroidery objects and stitch settings.
2. Is AI embroidery digitizing faster than manual digitizing?
AI can create an initial design faster, especially when the artwork is simple. However, complex designs may still require manual editing and testing.
3. Is manual digitizing better for complex logos?
Manual digitizing can provide more control over complex logos. The digitizer can adjust stitch direction, density, sequencing, and other details based on the design and fabric.
4. Can AI create professional embroidery files?
AI tools can create useful embroidery files, but the result should be reviewed before production. Some designs may need manual adjustments to improve their stitching quality.
5. Can AI and manual digitizing be used together?
Yes. AI can create an initial version, while a digitizer can review and improve the design manually. This combined approach can provide both automation and human control.